 Table of Contents
Flow Using Webhook Trigger
In Backflipt platform, you can create a flow that automates the process of account creation in Axway for new users. For example, you can create a flow that uses a webhook trigger to create a new user account on Axway.
Manually creating user accounts on the Axway application can be time-consuming. By automating the account creation process in Axway, you can free up your team to focus on other tasks. This can save time and improve efficiency.
Prerequisites:
- Sign in to the Backflipt platform and ensure you have the required privileges in Backflipt platform to create a flow.
- You have an active user account that you can use to authenticate in ServiceNow and Axway SecureTransp.
To create a flow using manual trigger:
- Go to My Flows > Flows dashboard.
- Select +Create Flow.
- In the Add flow dialog, enter the name and description.
![]()
- Select Next.
- In the Add Flow dialog, select Webhook trigger.
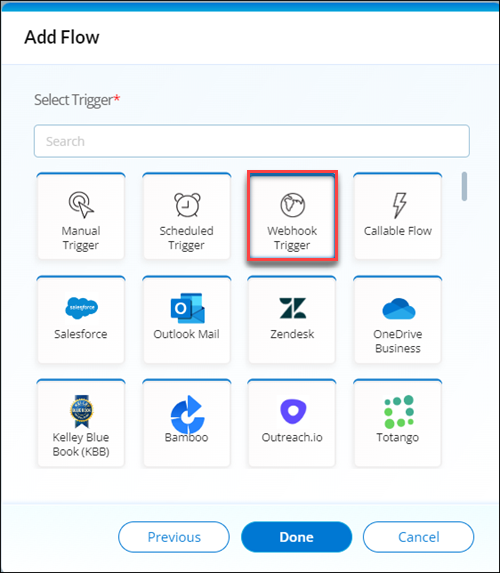
- Select Done. You will be redirected to the flow builder canvas.
Add the Webhook Trigger properties:
- In the properties panel related to Webhook:
- Enter the Step Title as Webhook Trigger.
- Enter the Step Description as servicenow- > axway.
- Add the Text Helper entity into the flow.
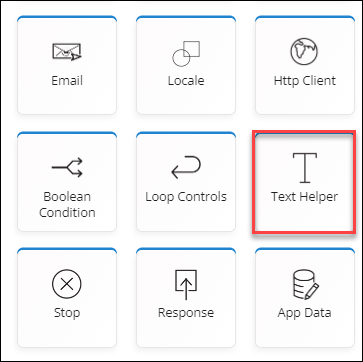
- In the properties panel related to Text Helper:
- Select the Operation as Generate Random Password.
- Enter the minimum Length of the password as 8 characters.
- Add Axway Secure Transport to the flow.
![]()
- In the properties panel related to the Axway Secure Transport:
- Select the Operation as Check and Create Account.
- Select the Account Name as logon_Name.
- Select the Account Type as User Account.
- Select the Home Folder as usrdata and home_directory.
- Select the Email as contact_email.
- Select the Password as text_helper_1.
- Check the Force Password Change checkbox.
- Check the Allow User Login via Email checkbox.
Add the logic to the flow:
- Add a Boolean Condition entity to the flow.
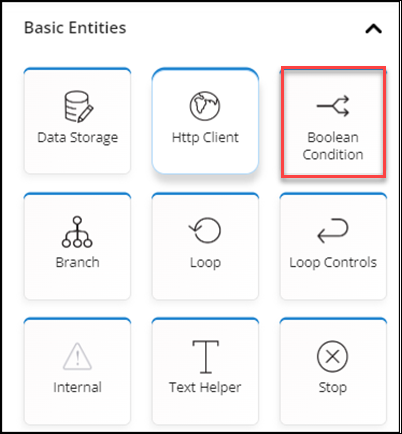
- In the properties panel related to the Boolean Condition:
- Enter the Step Title as Check If Account creation failed.
- Enter the Step Description as Boolean Condition.
- Select the Operation as Boolean Condition.
- Select Add Condition under Input.
- Select Value as JSON Path in the dropdown list under condition.
- Click on the Value box to select the step.
- Select the Value as Axway Secure Transport.
- Check the preCheck check box and close the Value box.
- Select Equals in the dropdown list under preCheck.
- Enter the text "success" in the Enter text field.
- In the False branch, add a Data Storage basic entity to prepare failure error message and to store data in specified scope if the above condition is not met.
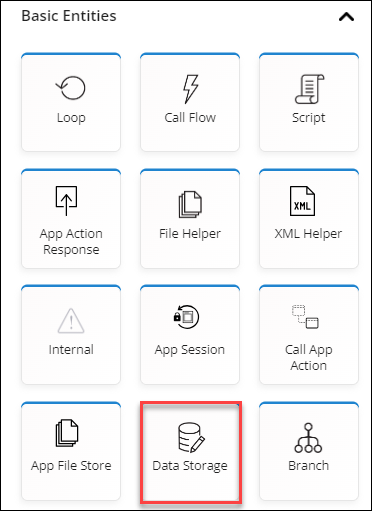
- In the properties panel related to the Data Storage:
- Enter the Step Title as Prepare failure error message.
- Enter the Step Description as Stores data in specified Scope.
- Select the Operation as Value OR Default.
- In the True branch, add a Data Storage basic entity to Store data in the specified Scope if the above condition is met.
- In the properties panel related to the Data Storage:
- Enter the Step Title as Data Storage.
- Enter the Step Description as Stores data in specified Scope.
- Select the Operation as Value OR Default.
- Enter the Key as "<em style="font-size:18px" > Welcome to Secure Transport!</em >
<br >
<br >
Hello <strong >
contact_name
x
</strong >
<br >
<br >
Your Secure Transport Account has been created. Please use the following details to login and change your password.
<br >
<br >
User ID : partner_Namex
<br >
Password : text_helper_1x
<br >
<br >
<a href="https://34.235.236.160:8443/" style="font-size: 10pt; font-family: Arial; text-decoration: underline; color: #0098db;" >
Please login to Web Client and change your password
</a >
<br >
<br >
<span style="margin-bottom:16px;color:#4C4C4C;" > Thank you,</span >
<br >
<span style="margin-bottom:16px;color:#4C4C4C;" > Secure Transport Administration Team
</span > "
- In the True branch, after Data Storage, add email_1 entity to the flow.
- In the properties panel related to the email_1:
- Enter the Step Title as Prepare failure error message.
- Select the Operation as Send Email.
- Enter the subject as Secure Transport Account Details.
- Select To Recipients as reported_by_email.
- Select Email Body as Data Storage.
- Select Priority as Normal.
- In the True branch, after email_1, add a Data Storage basic entity to the flow.
- In the properties panel related to the Data Storage:
- Enter the Step Title as Prepare success message.
- Enter the Step Description as Stores data in specified Scope.
- Select the Operation as Value OR Default.
- Enter the Key as "Axway Secure Transport Account has been successfully created for user accountNamex
Email: reported_by_emailx
Secure Transport Web Client Login Credentials has been sent to the above mail, Please check and login."
Add the action to the flow:
- Add Microsoft Teams to the flow.
- In the properties panel related to the Microsoft Teams:
- Select Operation as Send Message.
- Select the required Channel and add the relevant information in the rest of the input fields.
- Save the flow and set it as the latest version.
Once the flow is created, enable the flow to publish it to make it available for use.
When a user opens a ServiceNow ticket with their name and other details to create an Axway account, the ServiceNow to Axway Secure Transport flow is triggered. The flow creates an account in Axway with a random password and sends the account credentials to the user's email if the account creation is successful. Regardless of whether the account creation is successful or not, the user will receive a message in Microsoft Teams with the status of the account creation.